Okay, here’s your comprehensive guide on roof box installation and ownership:
Are you tired of cramped road trips where luggage spills into your precious legroom? Do you dream of adventure without sacrificing comfort? You’re not alone. Statistically, outdoor recreation participation is booming, and with it, the demand for extra cargo space in vehicles. A roof box is the answer, but improper installation can turn your dreams into a highway hazard. This guide will arm you with the knowledge to safely and effectively install, maintain, and choose the right roof box for your needs. Let’s get started.
What is a Roof Box and How Does it Work?
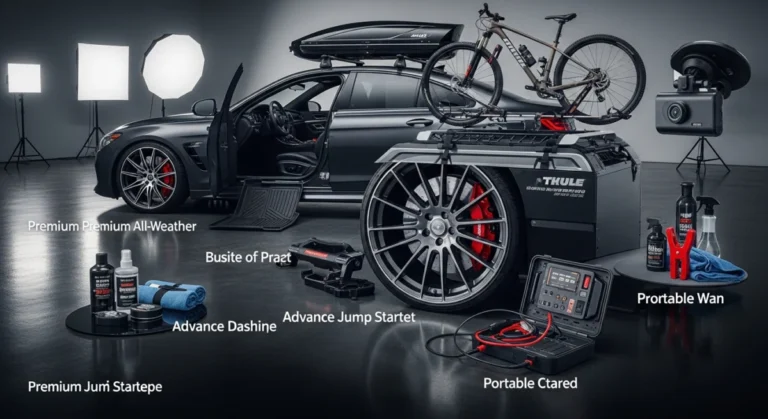
A roof box, also known as a cargo carrier or roof-mounted luggage box, is a streamlined container designed to be mounted on the roof of a vehicle to provide additional storage space. Think of it as an external trunk. They are typically made of durable, weather-resistant materials like ABS plastic or polyethylene.
How it Works
The fundamental principle is simple: the roof box attaches to existing roof rack crossbars. These crossbars are essential and must be compatible with your vehicle. The box itself features an internal system, often involving clamps or straps, that secures it to the crossbars. A hinged lid, usually lockable, provides access to the contents. The aerodynamic shape minimizes wind resistance and noise, although some increase in fuel consumption is inevitable.
Benefits and Key Features of Using a Roof Box
Roof boxes offer a compelling solution for a variety of needs, enhancing both practicality and convenience.
- Increased Cargo Capacity: The most obvious benefit! Transport skis, snowboards, camping gear, luggage, and more, freeing up valuable space inside the vehicle.
- Weather Protection: Keep your belongings dry and protected from rain, snow, dirt, and road debris.
- Security: Most roof boxes come with a locking mechanism, offering enhanced security compared to open roof racks.
- Aerodynamic Design: Modern roof boxes are engineered to minimize wind resistance and noise, contributing to a smoother and quieter ride.
- Versatility: Suitable for a wide range of vehicles with compatible roof racks.
- Organization: Keep your gear neatly organized and easily accessible, avoiding clutter inside the car.
- Different Sizes & Shapes: Find the exact size that fits your vehicle and needs. From short boxes for skis to longer boxes for camping equipment.
Key Features to Look For
- Material: ABS plastic offers a good balance of durability and affordability. Polyethylene is tougher but usually pricier.
- Size and Capacity: Choose a size that meets your storage needs without being excessively large for your vehicle. Consider the internal volume (measured in liters or cubic feet) and maximum weight capacity.
- Mounting System: Easy-to-use and secure mounting systems are crucial for hassle-free installation. Look for quick-release or tool-free options.
- Opening Mechanism: Dual-side opening allows access from either side of the vehicle, which is extremely convenient.
- Locking System: A robust locking system provides security and peace of mind. Central locking systems that secure multiple points are preferred.
- Aerodynamic Profile: Look for a sleek, low-profile design to minimize wind resistance and noise.
- Durability & Warranty: A longer warranty indicates the manufacturer’s confidence in the product’s quality.
- Weight Capacity: Be sure you know the weight your roof and crossbars are rated for, and never exceed that.
- UV Protection: Some boxes have UV protection to keep the plastic from cracking and fading.
Roof Box Installation: A Step-by-Step Guide
Proper installation is paramount for safety and performance. Follow these steps carefully.
1. Gather Your Tools and Materials:
- Roof box
- Vehicle’s roof rack crossbars (ensure they are compatible and securely installed)
- Measuring tape
- Wrench or appropriate tools for tightening mounting hardware (usually included with the roof box)
- Soft cloth or blanket to protect the vehicle’s roof
- Step ladder (optional, but recommended for taller vehicles)
- Gloves
2. Prepare the Roof Rack:
- Ensure the crossbars are properly positioned and tightened according to the vehicle manufacturer’s instructions.
- The spacing between the crossbars is crucial. Refer to the roof box’s instructions for the recommended distance.
- Clean the area on the roof where the box will sit to prevent scratching.
3. Position the Roof Box:
- With assistance (roof boxes can be heavy and awkward), carefully lift the roof box onto the roof rack.
- Center the box laterally on the roof, ensuring it’s equidistant from both sides of the vehicle.
- Position the box fore and aft, considering the vehicle’s roof curvature and the desired overhang (avoid excessive overhang at the front or rear).
4. Attach the Mounting Hardware:
- Open the roof box.
- Locate the mounting slots or points inside the box.
- Align the mounting hardware (clamps, U-bolts, straps) with the crossbars.
- Follow the manufacturer’s instructions for securing the hardware. Tighten the hardware evenly in a crisscross pattern to ensure even pressure.
- Double-check that all mounting points are securely fastened.
5. Final Inspection:
- Shake the box gently to ensure it’s firmly attached to the crossbars.
- Inspect the mounting hardware for any signs of looseness.
- Close and lock the box. Test the locking mechanism.
- From inside the vehicle, check for any obstructions or interference with the sunroof or rear hatch.
6. Load your belongings:
- Be sure to not exceed the maximum load rating.
- Distribute the weight evenly throughout the box.
- Make sure all items are secured so they don’t shift during transit.
Important Safety Notes:
- Always consult the roof box manufacturer’s instructions for specific installation guidelines.
- Never exceed the vehicle’s or the roof rack’s maximum weight capacity.
- Double-check the tightness of the mounting hardware after the first few miles of driving.
- Be aware of the vehicle’s increased height after installing the roof box, especially when entering parking garages or driving under low bridges.
Roof Box Maintenance and Care
Proper maintenance will prolong the life of your roof box and ensure its optimal performance.
- Regular Cleaning: Wash the roof box regularly with mild soap and water to remove dirt, dust, and road grime. Avoid harsh chemicals or abrasive cleaners.
- Lubrication: Lubricate the hinges and locking mechanisms periodically with a silicone-based lubricant to prevent corrosion and ensure smooth operation.
- Storage: When not in use, store the roof box in a cool, dry place, preferably indoors, to protect it from the elements. Consider using a roof box cover to prevent dust and scratches.
- Inspection: Regularly inspect the roof box for any signs of damage, such as cracks, dents, or loose hardware. Repair or replace damaged parts promptly.
- UV Protection: Apply a UV protectant spray or wax to the box’s surface every few months, especially if it’s stored outdoors, to prevent fading and cracking.
- Crossbar Check: Check and tighten the crossbars and mounting hardware before each use.
Top Buying Factors When Choosing a Roof Box
Selecting the right roof box requires careful consideration of your individual needs and vehicle.
- Vehicle Compatibility: Ensure the roof box is compatible with your vehicle’s roof rack system. Check the manufacturer’s specifications and consult a professional if needed.
- Size and Capacity: Choose a size that meets your storage needs without being excessively large for your vehicle. Consider the internal volume and maximum weight capacity.
- Opening Mechanism: Dual-side opening is highly recommended for convenience.
- Locking System: A secure locking system is essential for deterring theft. Central locking systems are preferred.
- Aerodynamic Profile: Look for a sleek, low-profile design to minimize wind resistance and noise.
- Material and Durability: Opt for a roof box made of durable, weather-resistant materials.
- Ease of Installation: Choose a roof box with a user-friendly mounting system.
- Brand Reputation and Warranty: Consider reputable brands that offer comprehensive warranties.
- Price: Roof boxes range in price from a few hundred to over a thousand dollars. Set a budget and compare different models within your price range.
- Usage Frequency: If you use your roof box frequently, invest in a higher-quality model with premium features.
Essential FAQs About Roof Boxes
Here are some common questions about roof boxes.
1. Will a roof box affect my fuel economy? Yes, a roof box will typically decrease fuel economy due to increased wind resistance. The extent of the impact depends on the vehicle, the roof box’s aerodynamic profile, and driving speed. Expect a decrease of 1-5 MPG. 2. How difficult is it to install a roof box? With proper tools and following the manufacturer’s instructions, most roof boxes can be installed in 30-60 minutes. Assistance is recommended due to the weight and awkwardness of the box. 3. Can I leave my roof box on my car all the time? While you *can*, it’s generally recommended to remove the roof box when not in use to minimize wind resistance and potential wear and tear. Also, prolonged sun exposure can damage the plastic. 4. Are roof boxes waterproof? Most roof boxes are highly water-resistant, but not completely waterproof. In heavy rain, some moisture may seep in. Consider using waterproof bags for sensitive items. 5. How do I choose the right size roof box for my skis? Measure the length of your longest skis. Choose a roof box that is at least as long as your skis, plus a few extra inches for clearance. Also, consider the width of the box if you want to carry multiple pairs of skis or snowboards.
Conclusion
A roof box is a fantastic investment for anyone seeking extra cargo space and enhanced convenience. By following the guidelines in this comprehensive guide, you can confidently choose, install, and maintain your roof box, ensuring safe and enjoyable travels for years to come. Remember, safety and proper installation are paramount, so don’t hesitate to consult a professional if you have any doubts. Happy travels!